Table of Contents
ToggleTile selection makes or breaks a bathroom renovation. It’s not just about aesthetics, the right tile choice impacts water resistance, maintenance, resale value, and how long your project holds up before needing a redo. In 2026, homeowners have more design flexibility than ever, from high-performance porcelain that mimics natural stone to bold geometric patterns that turn a shower wall into a focal point. This guide walks through current trends, material choices, and layout strategies to help DIYers and renovators make informed decisions before the first tile hits the wall.
Key Takeaways
- The best bathroom tiles design combines water-resistant materials, proper substrate prep, and thoughtful layout to prevent cracking, mold, and costly repairs.
- Porcelain tile dominates modern bathrooms for its durability, low maintenance, and ability to mimic natural stone—choose impervious ratings (under 0.5% water absorption) for wet areas.
- Trending bathroom tile designs in 2026 favor warm neutrals and marble-look porcelain over stark white, with geometric patterns and zellige-style tiles adding visual interest on accent walls.
- Large-format tiles (12″×24″ or larger) with offset layouts reduce grout lines and create a seamless, contemporary look, but require near-perfect substrate flatness and skilled installation.
- Starting with a level reference line and dry-laying tiles before installation prevents expensive mistakes like misaligned cuts, awkward slivers, and uneven joints.
Why Tile Selection Matters for Your Bathroom
Bathrooms are high-moisture, high-traffic spaces. The tile you choose has to handle steam, splashes, cleaning chemicals, and daily foot traffic without cracking, staining, or developing mold in the grout lines.
Water resistance is non-negotiable. Wall tiles need a water absorption rate below 3% for wet areas like showers (ANSI rates this as “impervious” or “vitreous”). Floor tiles must also provide slip resistance, look for a COF (Coefficient of Friction) rating of 0.60 or higher for wet surfaces to meet ADA guidelines and avoid falls.
Beyond function, tile sets the visual tone. A poorly scaled pattern can make a small powder room feel claustrophobic, while the wrong grout color can cheapen an otherwise high-end install. Tile choice also affects resale: neutral, classic designs appeal to more buyers, but a well-executed bold pattern can differentiate your home in a competitive market.
Finally, don’t ignore the install complexity. Large-format tiles (anything over 15″×15″) require near-perfect substrate flatness and skilled layout. Tiny mosaics look stunning but take twice as long to install and grout. If you’re tackling this yourself, match your tile choice to your skill level, or budget for a pro if the design demands it.
Top Bathroom Tile Designs Trending in 2026
Bathroom tile trends in 2026 balance timeless appeal with fresh, personalized touches. Homeowners are moving away from stark white subway tile and embracing textures, color variation, and statement-making installations. Exploring different tile types can help narrow down what works for your project.
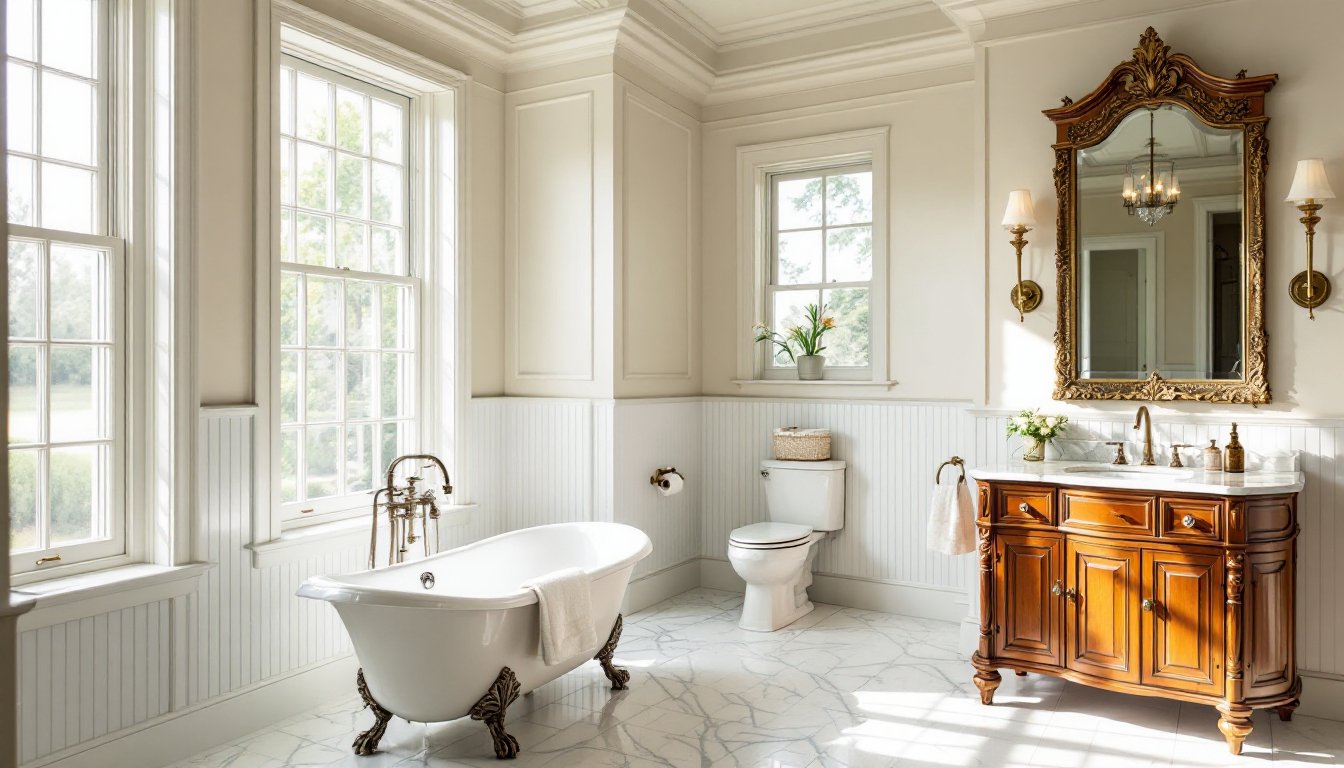
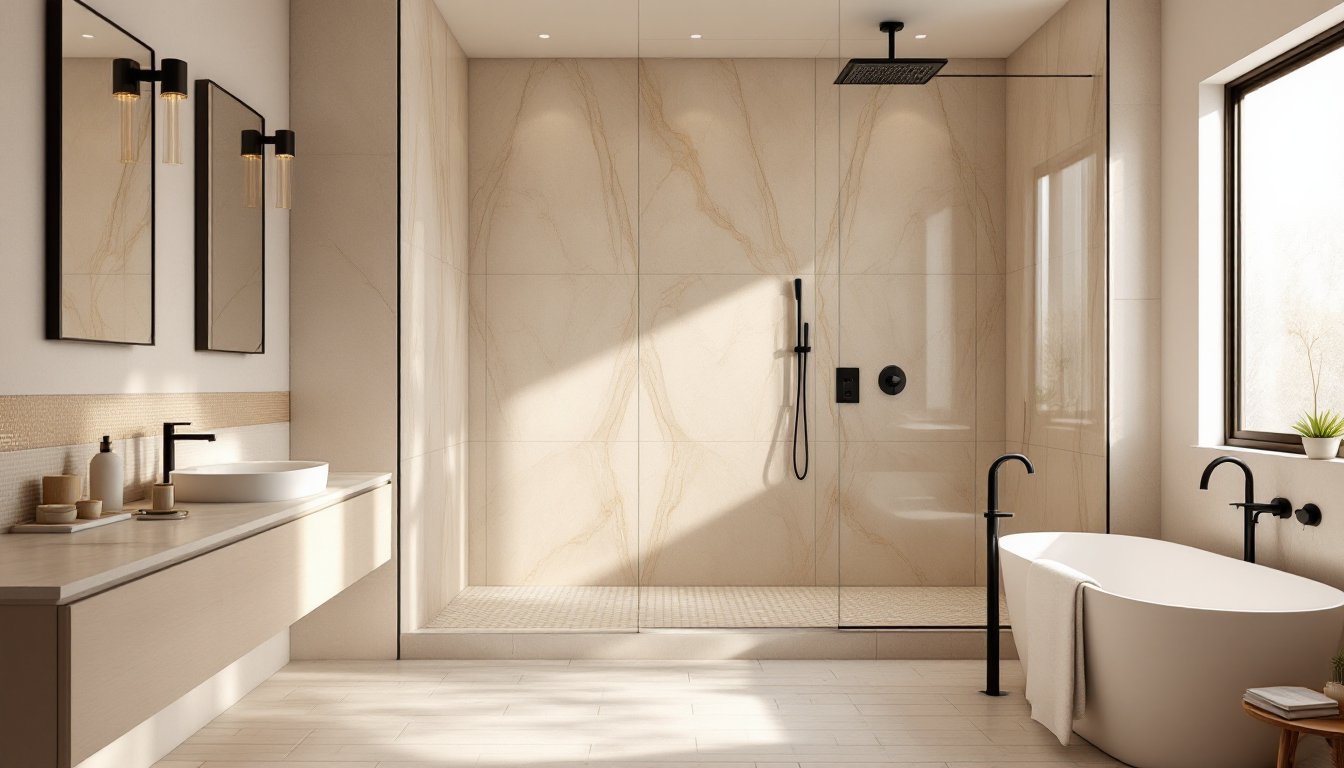
Natural Stone and Marble-Look Porcelain
Natural stone, especially travertine, limestone, and honed marble, continues to dominate high-end bathrooms. These materials bring organic color variation and texture that can’t be fully replicated. But they require sealing (typically every 6–12 months) and are softer than porcelain, making them prone to etching from acidic cleaners.
For a lower-maintenance alternative, marble-look porcelain has improved dramatically. Modern digital printing and varied tile thicknesses create realistic veining and depth. Porcelain is denser, doesn’t need sealing, and handles moisture better than real stone. Look for large-format slabs (48″×96″ or larger) with book-matched veining for a seamless, luxe look. Installation requires a flat substrate and large-format mortar to prevent lippage.
Color-wise, warm neutrals are in: soft beiges, warm grays, and creamy whites. Cool grays are fading out. If you’re considering inspiration for overall design harmony, browsing home design platforms can spark ideas that tie tile choices into broader decor themes.
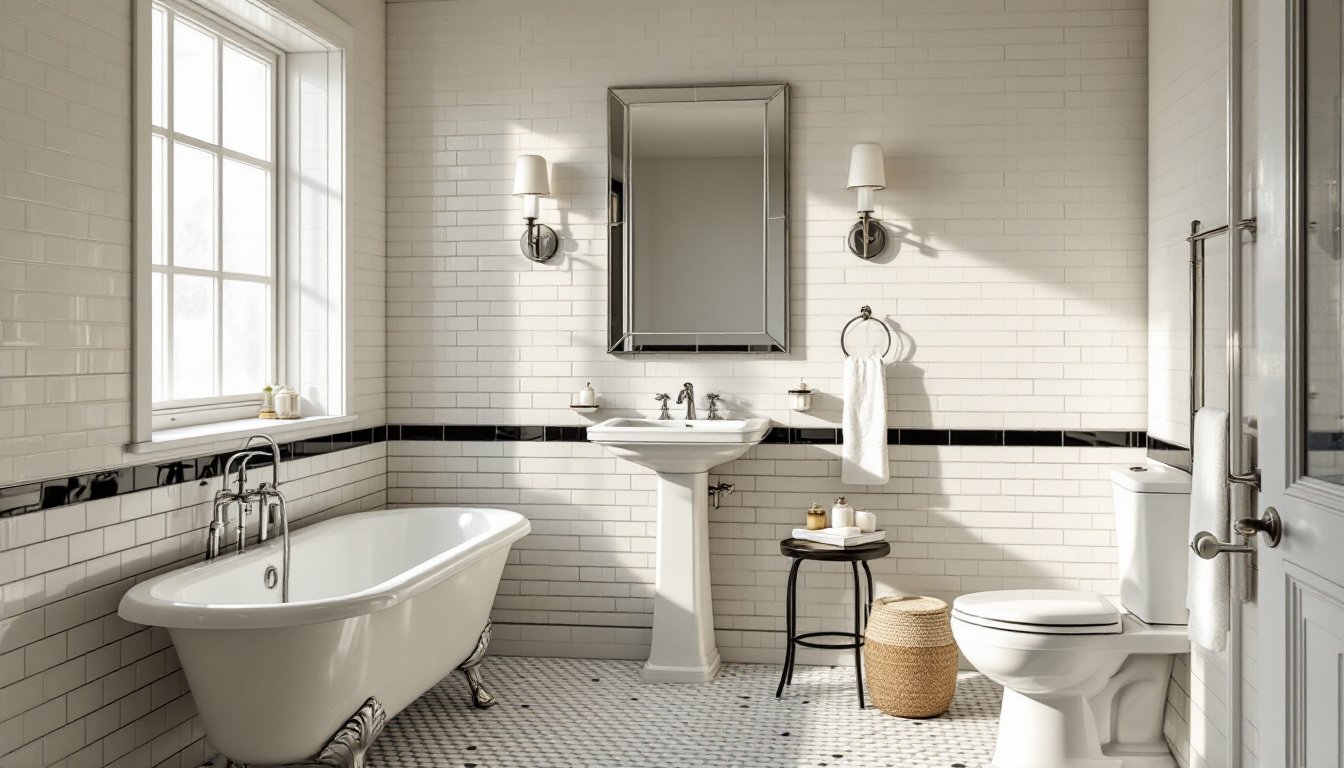
Bold Geometric Patterns and Mosaics
Geometric tile patterns, hexagons, chevrons, zellige-style irregular rectangles, are having a moment, especially on accent walls and shower niches. These designs add visual interest without overwhelming the space, particularly when used sparingly.
Hexagon tiles (typically 2″–4″ across) work well on floors or as a shower pan. Install them with tight grout lines (1/16″ to 1/8″) for a modern look. Larger hex formats (8″–10″) simplify installation and reduce grout maintenance.
Zellige or handmade-look tiles offer irregular edges and subtle glaze variations. Real zellige is pricey and delicate: machine-made versions capture the aesthetic at a fraction of the cost and with better durability. These tiles shine in natural or warm white tones on feature walls or behind vanities.
Mosaic sheets (glass, stone, or porcelain chips on a mesh backing) remain popular for accent strips, niches, and backsplashes. Glass mosaics reflect light and work well in small spaces, but grout lines can be a maintenance headache if not sealed properly. Use an epoxy grout in wet areas for stain resistance and easier cleaning.
One caution: busy patterns can date quickly. If you’re investing in a full bathroom remodel, consider timeless geometry or reserve bold patterns for easy-to-replace areas.
Choosing the Right Tile Material for Durability and Style
Tile material dictates performance, cost, and how forgiving the install will be. Here’s a breakdown of the most common options.
Porcelain is the workhorse. It’s fired at higher temperatures than ceramic, making it denser, less porous, and suitable for floors, walls, and even outdoor applications. Porcelain tile rated as “impervious” (less than 0.5% water absorption) is ideal for showers and wet rooms. It’s available in endless finishes, matte, polished, textured, and can mimic wood, stone, or concrete. Porcelain is also harder on saw blades, so budget for a wet saw with a diamond blade if cutting yourself.
Ceramic tile is lighter, easier to cut, and cheaper than porcelain. It works well for walls and low-traffic floors, but it’s more porous and can crack under heavy impact. In wet areas, stick to glazed ceramic for water resistance. Unglazed ceramic absorbs moisture and isn’t suitable for bathrooms unless sealed.
Natural stone (marble, travertine, slate) offers unmatched character but demands more maintenance. Stone tiles vary in hardness, slate and granite are durable: marble and limestone scratch and stain more easily. All stone requires a penetrating sealer before grouting and periodic resealing. Stone is also more expensive, both in material cost and installation labor.
Glass tile is waterproof, stain-proof, and visually striking, especially in mosaics or accent strips. It’s brittle, though, so substrate prep is critical, any movement or unevenness will crack the tile. Glass also shows thinset through translucent tiles, so use white thinset and back-butter each tile for full coverage.
Cement tile (encaustic tile) is making a comeback for its bold, handcrafted patterns. It’s porous and must be sealed before and after grouting. It’s best reserved for powder room floors or accent walls, don’t use it in showers or high-moisture areas unless you’re committed to ongoing maintenance.
When planning your tile installation, material choice directly affects prep work, tool requirements, and long-term upkeep. Match the material to the application and your willingness to maintain it.
Best Tile Layouts and Placement Strategies
How you lay tile is just as important as what tile you choose. Layout affects visual proportion, grout line maintenance, and installation difficulty.
Floor tile layouts:
- Straight stack (grid): Simplest to install, clean look, but can highlight lippage and imperfections. Works well with large-format tiles (12″×24″ or larger).
- Offset/brick pattern (running bond): Classic and forgiving. Offset tiles by 1/3 or 1/2 their length. Avoid 50% offset (subway-style) on tiles longer than 18″: it can highlight bowing (the “stair-step” effect).
- Herringbone or chevron: Eye-catching but labor-intensive. Requires precise cuts and more waste. Use rectified tiles (sharp, consistent edges) for tight grout lines.
- Diagonal: Visually expands a small space but increases waste and cutting. Plan your layout from the room’s center point outward.
Wall tile layouts:
- Subway style (1/3 offset): Timeless and versatile. Use 3″×6″ or larger formats (4″×12″, 4″×16″) to reduce grout lines.
- Vertical stack: Makes ceilings feel taller. Works especially well with rectangular tiles (e.g., 12″×24″ installed vertically).
- Accent strip at eye level: A single row of mosaic or contrasting tile breaks up a large expanse. Install it around 60″–66″ from the floor for visual balance.
Key placement tips:
- Start with a level reference line. Don’t assume your floor or tub deck is level, it’s probably not. Snap a chalk line and work from there.
- Dry-lay your tiles first. This reveals how cuts will land at edges, around fixtures, and in corners. Adjust your starting point to avoid tiny slivers (anything under 2″ wide looks amateurish and is hard to cut).
- Plan grout joints. Rectified tiles can use tight 1/16″ joints for a seamless look. Non-rectified (slightly irregular edges) need 1/8″–3/16″ joints to absorb size variation.
- Budget for waste. Plan for 10% overage on straight layouts, 15% on diagonal or patterned installs.
For platforms showcasing finished layouts and installations, browsing through design inspiration galleries can help visualize how different layouts perform in real bathrooms.
Safety and prep notes: Tile is only as good as the substrate beneath it. Ensure your subfloor is structurally sound (at least 1-1/8″ thick for floor tile over joists 16″ on center). Use cement backer board or a waterproof membrane like Schluter Kerdi in wet areas. Skipping this step invites cracked tile and mold growth behind the walls. Wear safety goggles and a dust mask when cutting tile, and use knee pads, tile installs are hard on joints.
Conclusion
Choosing the best bathroom tile design comes down to balancing style, function, and installation realism. Prioritize water-resistant materials, plan your layout to minimize waste and awkward cuts, and don’t skip substrate prep. Whether it’s a marble-look porcelain statement wall or a geometric mosaic floor, a well-executed tile job elevates the entire bathroom and holds up for years.