Table of Contents
ToggleA bathroom floor plan isn’t about squeezing fixtures into a room, it’s about creating a space that works every single morning and night. Whether renovating an existing bath or building from scratch, the layout determines everything from function to resale value. Poor planning means cabinet doors that hit toilet tanks, showers that flood thresholds, and vanities too cramped for two people to share. Getting the floor plan right means understanding code minimums, traffic flow, and how real people actually use the space. This guide breaks down the measurements, layout options, and practical considerations that separate a frustrating bathroom from one that just works.
Key Takeaways
- A well-designed bathroom floor plan balances code compliance with functional traffic flow, preventing costly fixture conflicts and ensuring daily usability for all household members.
- Master the IRC minimum clearances—15 inches from toilet centerline to sidewalls, 21 inches front clearance, and 30×30-inch showers (36×36 preferred)—as the foundation of any bathroom floor plan design.
- Small bathrooms under 50 square feet benefit from linear layouts with plumbing consolidated to one wall, while master bathrooms thrive with split vanities and separate wet zones that accommodate simultaneous use.
- Poor lighting design, undersized exhaust fans, and underestimated door swing radius are the most common bathroom floor plan mistakes that lead to expensive post-construction fixes.
- Incorporate accessibility features like curbless showers, grab bar blocking, and lever faucets during the floor plan stage—retrofitting them later costs significantly more.
- Keep fixtures on existing wet walls when possible to dramatically reduce plumbing expenses, and always verify door swing clearance with full-scale mockups before finalizing your bathroom floor plan.
Understanding Bathroom Floor Plan Basics
Before sketching a single line, homeowners need to understand the minimum clearances mandated by the International Residential Code (IRC) and industry best practices. These aren’t arbitrary numbers, they’re based on ergonomics, safety, and plumbing logistics.
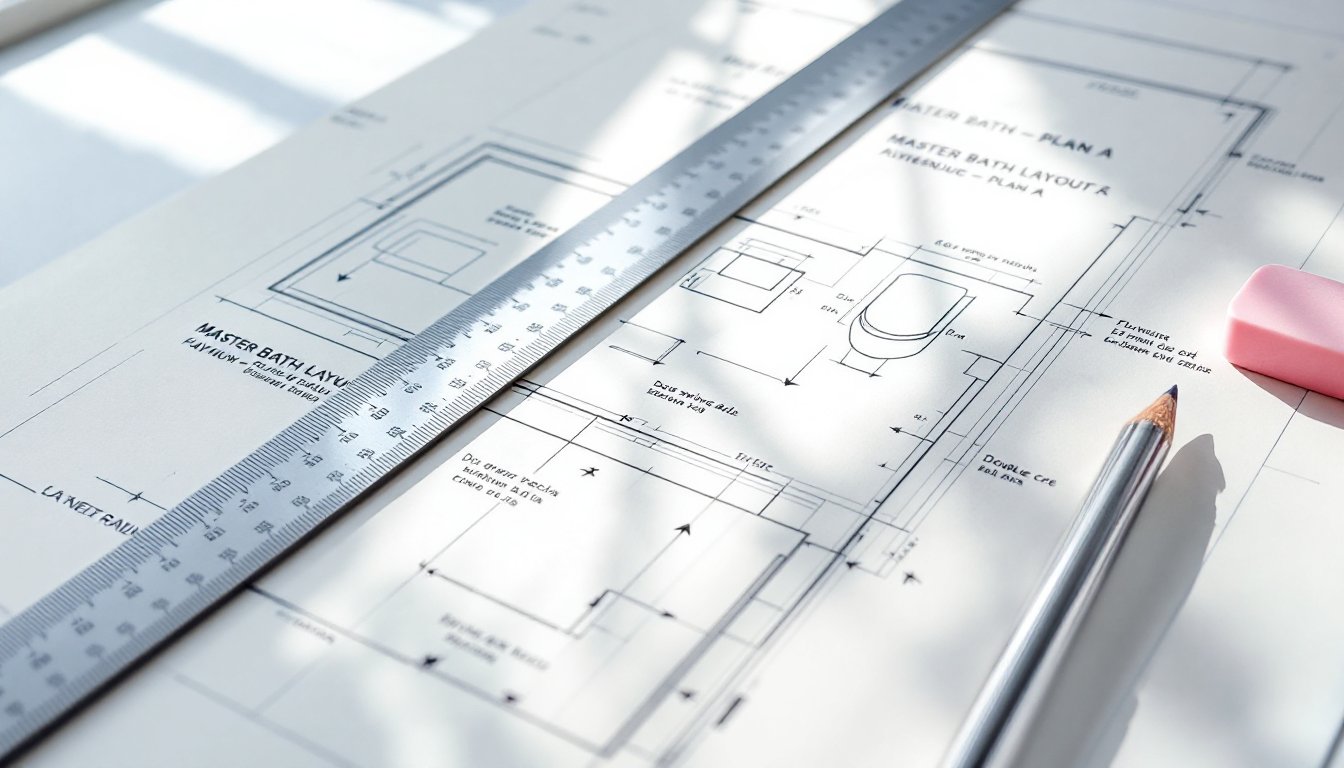
Start with the toilet. The IRC requires 15 inches of clearance from the center of the toilet to any side wall or fixture, meaning a 30-inch-wide footprint minimum. Front clearance requires 21 inches from the toilet rim to any opposing wall or fixture, though 30 inches feels far more comfortable in practice. Sinks need 21 inches of clearance in front and at least 15 inches from centerline to sidewalls. Showers must measure 30 inches by 30 inches minimum (though 36 by 36 inches is far more practical for actual use).
Doorways present their own challenge. Standard bathroom doors run 24 to 32 inches wide, with 32 inches being ideal for accessibility and resale. The door swing can’t obstruct fixtures, a toilet placement that blocks the door from opening fully fails inspection in many jurisdictions. Pocket doors or outswing doors solve tight spaces but add cost and complexity.
Ventilation isn’t optional. Most codes require either a window with at least 3 square feet of openable area or a mechanical exhaust fan rated for the room’s cubic footage (typically 50 CFM for bathrooms under 100 square feet). Skipping this leads to mold, peeling paint, and failed inspections.
Essential Measurements and Clearance Requirements
Beyond code minimums, functional bathrooms need breathing room. A standard vanity sits 32 to 36 inches high (comfort-height models run 36 inches, matching kitchen counters). Depth typically runs 21 inches, though narrow bathrooms can use 18-inch-deep units without losing much usability.
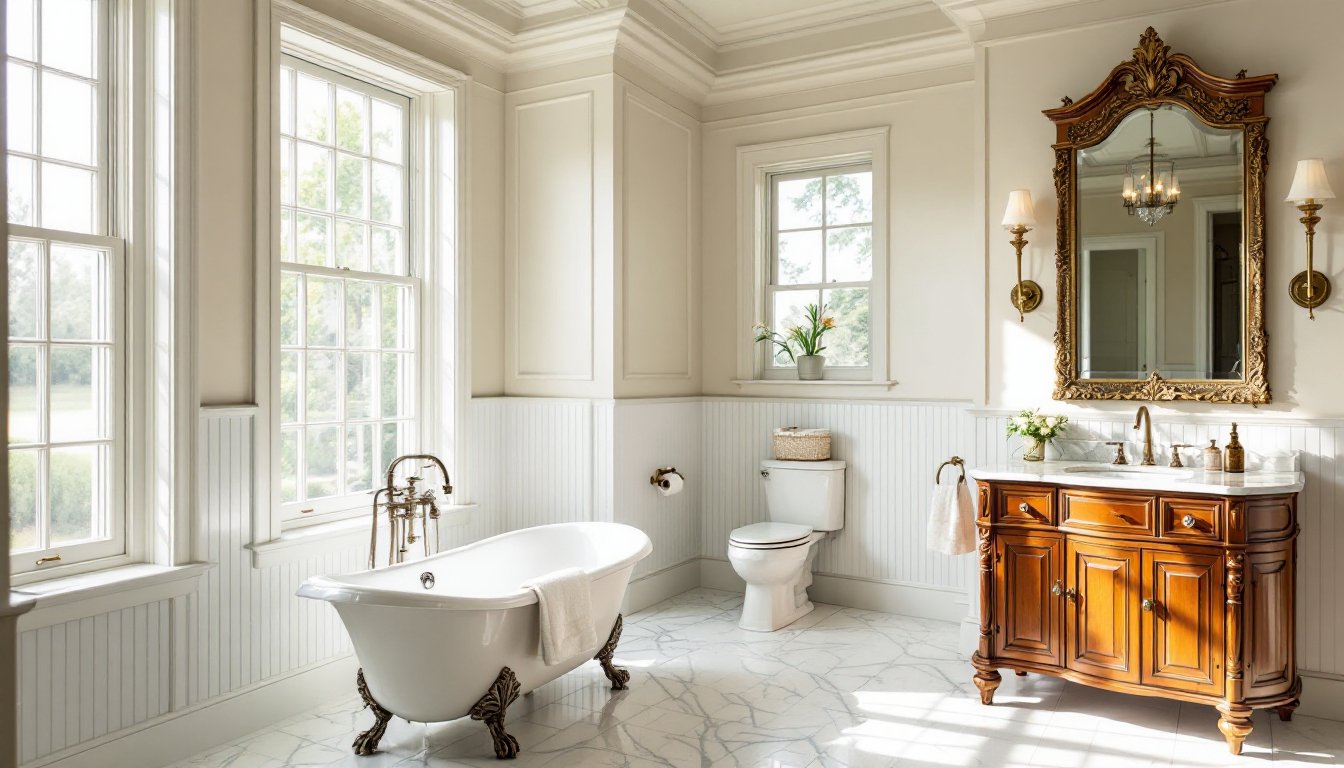
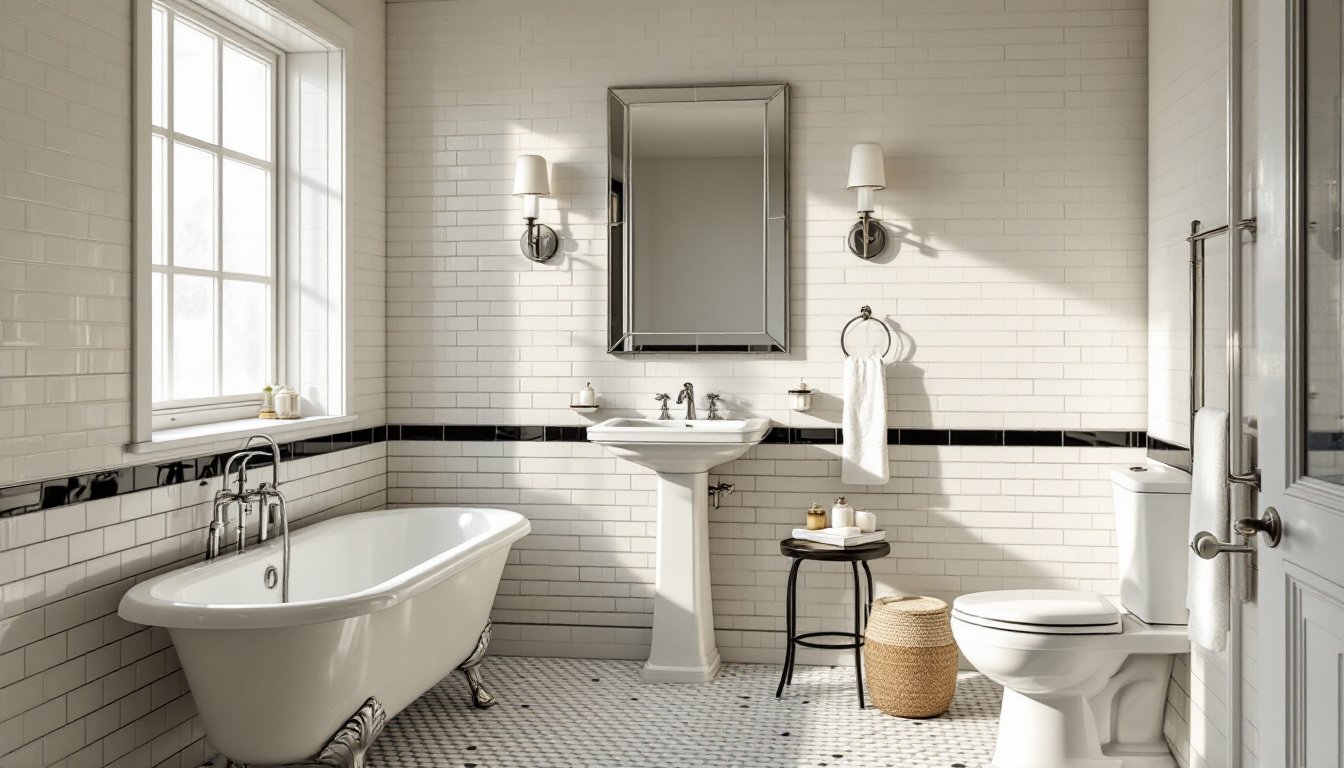
Shower and tub placement requires careful drain and supply line planning. Standard tub alcoves measure 60 inches long by 30 to 32 inches wide. Freestanding tubs need 6 inches of clearance on all sides for cleaning and visual balance. Walk-in showers should target 48 by 36 inches or larger for comfort: anything smaller feels cramped unless building a dedicated water closet.
Ceiling height matters more than most realize. The IRC mandates 80 inches minimum for most bathroom areas, but sloped ceilings (common in attic conversions) can drop to 60 inches over the toilet or tub perimeter, provided at least 50% of the room meets the 80-inch requirement. Low ceilings combined with inadequate ventilation create moisture traps.
Electrical outlets must sit GFCI-protected and at least 6 feet from tub or shower edges (NEC 210.8). Lighting over showers requires wet-location-rated fixtures. These aren’t suggestions, inspectors will red-tag installations that violate these standards.
Popular Bathroom Layout Styles for Different Spaces
Bathroom layouts fall into distinct categories based on square footage and fixture count. Each configuration solves specific problems but introduces its own constraints.
Small Bathroom Floor Plans (Under 50 Square Feet)
Three-quarter baths (toilet, sink, shower) dominate small footprints. The classic 5×8-foot layout places the shower at one end, toilet mid-wall, and vanity opposite. This linear arrangement keeps plumbing on one wall, reducing cost and complexity. Door placement typically centers on the 5-foot wall to avoid swing conflicts.
The corner shower layout pushes the shower into a corner with neo-angle or curved doors, freeing up the long wall for a longer vanity. This works well in narrow 5×7-foot or 6×6-foot spaces. Many design platforms feature variations of this efficient arrangement.
Powder rooms (toilet and sink only) can function in 20 to 25 square feet if absolutely necessary, though 30 square feet feels less claustrophobic. Wall-hung toilets and compact pedestal sinks minimize the footprint. Pocket doors become nearly mandatory at this scale.
Small bathrooms demand careful material selection. Large-format tiles (12×24 inches or larger) with minimal grout lines make spaces feel bigger. Wall-mounted vanities create visual space underneath. Medicine cabinets recessed into walls save 4 to 6 inches of depth compared to surface-mount models.
Medium and Master Bathroom Layouts
Full bathrooms (75 to 100 square feet) accommodate tub-shower combos or separate fixtures. The wet zone approach clusters the tub and toilet at one end with the vanity on the opposite wall, creating distinct dry and wet areas. This layout works beautifully in 8×10-foot or 9×9-foot spaces.
Master bathrooms (100+ square feet) open up dual-sink vanities, separate shower and tub zones, and private toilet enclosures. The split vanity layout places sinks on opposite walls with the toilet and shower between them, ideal for couples who need simultaneous access. Dedicated water closets (toilet rooms) require only 30 to 36 inches wide by 60 inches deep but dramatically improve privacy.
L-shaped and U-shaped layouts distribute fixtures around the perimeter, maximizing floor space in the center. These work particularly well in 10×10-foot or larger bathrooms, though plumbing runs become more complex and costly when fixtures span multiple walls.
Luxury master baths often incorporate freestanding tubs as focal points. Position these near windows or architectural features, but remember: they require floor joists capable of supporting 1,000+ pounds when filled. Structural reinforcement isn’t optional on second floors or over crawl spaces.
Optimizing Your Bathroom Floor Plan for Function and Flow
A code-compliant floor plan isn’t the same as a functional one. Optimizing for daily use requires thinking through actual routines and traffic patterns.
The morning traffic test: If two people use the space simultaneously, can they access the toilet, sink, and shower without blocking each other? Bathrooms under 60 square feet rarely pass this test. Solutions include dual sinks spaced at least 30 inches apart (center to center), separate water closets, or simply accepting that the space works for one person at a time.
Storage planning happens during the floor plan stage, not as an afterthought. Vanities should include drawer stacks rather than single-door cabinets, drawers maximize vertical storage and accessibility. Linen closets adjacent to bathrooms beat in-room shelving for hiding bulky items. Recessed niches in shower walls (built during framing) eliminate the need for caddies and ledges.
Sightlines matter. Position toilets out of direct view from hallways or bedroom doorways whenever possible. Angled walls, partial-height partitions, or strategic door swings solve this without requiring full enclosures. Many flooring and layout resources address how material transitions and sightlines work together.
Heating and ventilation affect daily comfort more than most realize. Floor registers under vanities blow dust: toe-kick heaters work better but add cost. Heated floors (electric mats or hydronic systems) eliminate cold tile shock in winter and help dry the space. Exhaust fans should vent outdoors, not into attics, condensation in attic spaces causes mold and rots sheathing.
Accessibility and aging-in-place features cost little to incorporate during new construction but become expensive retrofits. A curbless shower requires proper subfloor pitch and waterproofing but eliminates a major trip hazard. Blocking in walls for future grab bars (2×6 or 2×8 horizontal blocking at 33 to 36 inches high) costs pennies now, hundreds later. Lever faucets work better than knobs for arthritic hands. These aren’t just “elderly” features, they make bathrooms easier for everyone.
Common Floor Plan Mistakes to Avoid
Most bathroom renovations stumble over the same avoidable errors. Recognizing them early saves thousands in corrections.
Ignoring existing plumbing locations. Moving a toilet costs $500 to $1,500+ depending on floor structure and drain routing. Keeping fixtures on existing wet walls (walls that already contain supply and drain lines) dramatically reduces plumbing costs. If the old toilet sat on the back wall, strongly consider keeping the new one there unless the layout gain justifies the expense.
Underestimating door swing radius. Doors need clearance to open fully without hitting toilets, vanities, or shower enclosures. A 32-inch door requires roughly 32 inches of arc space. Homeowners often discover too late that the toilet placement forces the door to stop at 45 degrees. Mock up the swing with cardboard during planning.
Skimping on shower size. The 30×30-inch code minimum feels claustrophobic and limits resale appeal. Standard prefab shower bases run 32, 36, 48, and 60 inches. Jumping from 32 to 36 inches costs little but dramatically improves usability. Custom tile showers should target 48×36 inches minimum: anything less feels dated in current markets.
Poor lighting design. Overhead-only lighting casts shadows on faces at mirrors. Vanity lighting should flank or top the mirror at 75 to 80 inches above the finished floor. Dimmers on all bathroom lights improve ambiance and function. Shower lights need wet ratings, regular recessed cans fail and create electrical hazards.
Neglecting ventilation capacity. Undersized exhaust fans can’t handle steam from showers, leading to mold on ceilings and in wall cavities. Calculate required CFM (cubic feet per minute) by multiplying room length × width × height, then dividing by 7.5 for standard bathrooms (or by 1.5 for rooms with enclosed toilets or multiple showerheads). Bathrooms with heavy steam loads benefit from humidity-sensing switches that run fans automatically.
Forgetting about structural implications. Large tile (especially natural stone) adds significant weight. Cement backer board, thin-set, and tile combined can add 10 to 15 pounds per square foot. Floor joists sized for carpet and plywood may need reinforcement. Detailed renovation planning guides address these structural considerations. Consult an engineer before installing heavy materials on second floors or over finished basements.
Underestimating the value of a second set of eyes. Floor plans look different on paper than they feel in three dimensions. Use visual planning tools to mock up layouts, or tape out fixture locations on the floor with painter’s tape. Walk through the motions, sitting, showering, reaching, before finalizing the design. What seems adequate on graph paper often reveals problems when tested at full scale.