Table of Contents
ToggleA small bathroom doesn’t mean settling for cramped or cluttered. With smart design choices and intentional planning, even a five-by-eight space can feel open, functional, and surprisingly comfortable. The challenge isn’t about adding square footage, it’s about making every inch work harder. Whether tackling a gut renovation or a cosmetic refresh, understanding how layout, color, storage, and fixtures interact will transform a tight bathroom into one that feels deliberately designed, not accidentally squeezed in.
Key Takeaways
- Smart bathroom design ideas for small spaces prioritize layout efficiency by respecting building code clearances (15 inches from toilet centerline, 21 inches in front) and choosing wall-hung fixtures like pedestal sinks or corner basins to maximize floor space.
- Light colors, satin or semi-gloss paint, and layered lighting (recessed cans plus sconces) create the illusion of a larger bathroom without costly renovations.
- Recessed shelving between wall studs and floating shelves above the toilet or sink provide functional storage without eating into precious floor space.
- Wall-mounted vanities and toilets free up floor visibility and make cleaning easier, though they require professional installation and solid wall backing.
- In bathrooms under 50 square feet, choosing a shower over a tub saves approximately 6 square feet, and corner showers with neo-angle doors maximize layout efficiency.
- Large mirrors extending from countertop to near ceiling, combined with reflective tiles and metal finishes, double perceived space and amplify natural or artificial light in compact bathrooms.
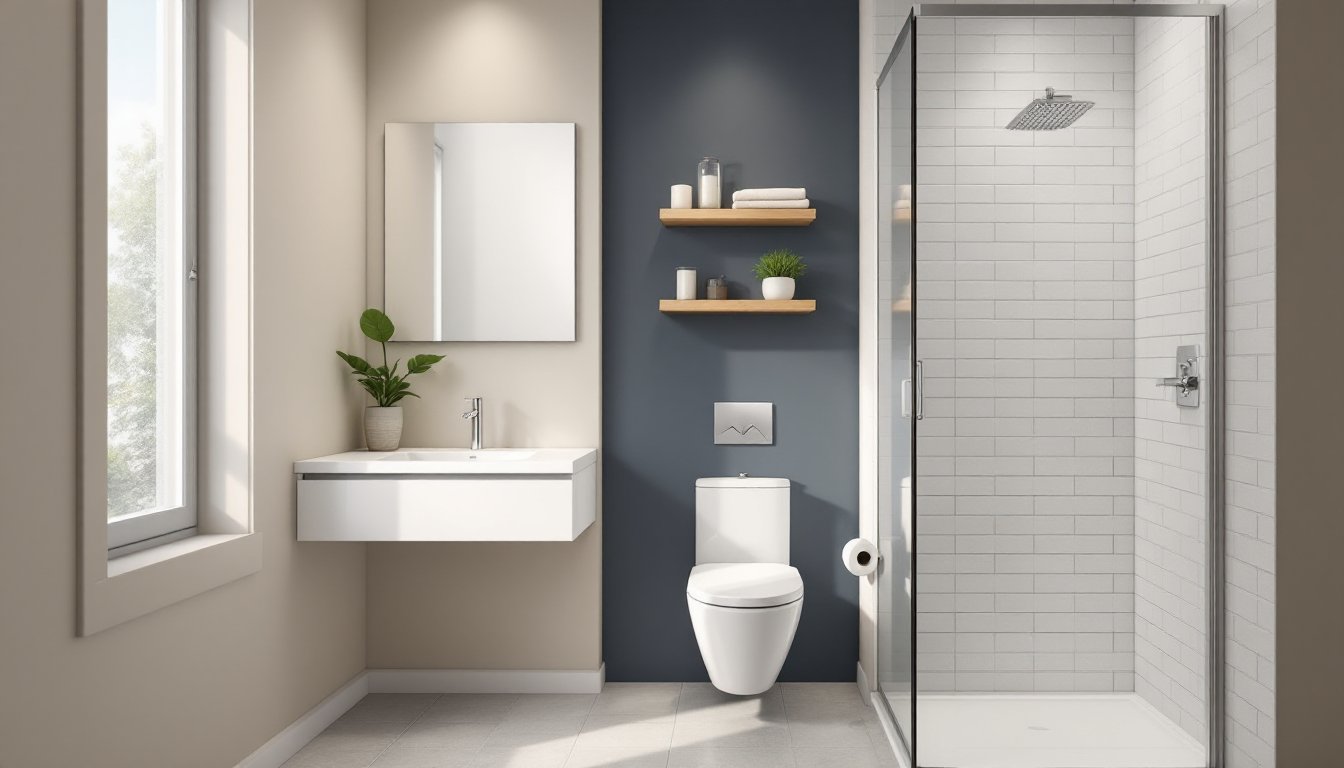
Smart Layout Strategies for Compact Bathrooms
Layout decisions dictate how usable a small bathroom feels. Poor placement wastes space and creates bottlenecks: thoughtful arrangements open up circulation and make the room function above its size.
Start by mapping out clearances. The International Residential Code (IRC) requires 15 inches minimum from the centerline of a toilet to any side wall or fixture, and 21 inches of clear space in front of the toilet or sink. These aren’t suggestions, they’re code minimums in most jurisdictions, and they directly affect comfort.
Consider a corner sink or pedestal sink to free up floor space. A standard 24-inch vanity eats up significant real estate: a corner-mounted basin or 18-inch wall-hung sink keeps pathways open. If the door swings inward and collides with fixtures, explore a pocket door or an outswing. Pocket doors require wall cavity depth (typically 4–6 inches), so check stud spacing and plumbing routes before committing.
Shower placement matters. Placing the shower at the far end of the room (opposite the entry) creates a sight line that lengthens the perceived space. Avoid centering the toilet directly in the entrance view, offset it slightly or shield it with a short privacy wall if the layout allows.
For bathrooms under 40 square feet, avoid trying to cram in both a tub and a separate shower. Choose one and design around it. This is where honest assessment pays off: if no one in the household takes baths, a tub becomes wasted square footage.
Color and Light Techniques to Expand Your Space
Paint and lighting are the cheapest spatial illusions available. Use them right, and a seven-foot ceiling suddenly feels less oppressive.
Light colors reflect more light, which makes walls recede visually. Whites, soft grays, pale blues, and warm beiges are safe bets. But don’t mistake “light” for “boring.” A single accent wall in a deeper tone, navy, charcoal, or even a muted terracotta, adds depth without closing in the room. Just keep it to one wall, ideally the one farthest from the entry.
Gloss level matters. Satin or semi-gloss paint reflects more light than flat or matte finishes, which can help in windowless or poorly lit bathrooms. Semi-gloss also holds up better to moisture and wipes clean more easily, important in a high-humidity environment.
Layered lighting beats a single overhead fixture every time. Combine recessed ceiling lights (4-inch cans work well in tight spaces) with sconces flanking the mirror and under-cabinet or toe-kick LED strips. Aim for around 75–100 lumens per square foot in a bathroom, enough to shave or apply makeup without shadows.
If the bathroom has a window, don’t block it with heavy treatments. A frosted or textured glass film provides privacy while letting in natural light. For rentals or temporary solutions, cellular shades in a light-filtering fabric work well.
Small spaces can handle bolder choices when done thoughtfully. Designers often suggest incorporating accent colors in compact bathrooms to inject personality without overwhelming the space.
Storage Solutions That Don’t Sacrifice Style
Storage makes or breaks a small bathroom. Too little, and countertops become cluttered staging areas. Too much, and the room feels like a closet.
Recessed shelving is the gold standard for adding storage without eating floor space. A typical stud bay (14.5 inches wide between studs) is perfect for shallow shelves between studs in the shower or above the toilet. Depth is limited, about 3.5 inches with standard 2×4 framing, but that’s enough for toiletries, folded towels, or decor. Avoid cutting into exterior walls without confirming insulation and moisture barrier details.
Medicine cabinets recessed into the wall above the sink replace a flat mirror and add concealed storage. Standard models fit between 16-inch on-center studs. Check for plumbing, electrical, or ductwork behind the wall before cutting.
Floating shelves (real ones, not flimsy brackets) can go above the toilet or next to the sink. Use heavy-duty anchors rated for at least 50 pounds if mounting to drywall without hitting studs. Open shelving works if kept minimal, three to five items max. More than that, and it reads as clutter.
Vanity drawers beat cabinet doors for accessibility. Shallow drawers (4–6 inches deep) organize small items without the black-hole effect of a deep cabinet. Soft-close hardware is worth the extra cost in a small room, no door slams.
For renters or temporary solutions, an over-the-toilet shelving unit or a rolling cart can add storage without permanent installation. Choose metal or wood over plastic: the material quality affects whether it looks intentional or like dorm furniture.
Choosing the Right Fixtures and Fittings
Fixtures are where function and space savings intersect. The wrong vanity or toilet can dominate a small bathroom: the right ones practically disappear while doing their job.
Wall-Mounted Vanities and Toilets
Wall-hung vanities free up floor space and make the room feel larger by exposing more of the floor. They also simplify cleaning, no base to work around. Most mount to a steel or wood cleat secured to wall studs, and they require solid backing. If the wall is already closed up, reinforcement may require opening drywall to add blocking between studs.
Typical wall-hung vanities project 18–21 inches from the wall and come in widths from 24 to 48 inches. For small bathrooms, a 24- or 30-inch model is usually sufficient. Make sure the plumbing rough-in (drain and supply lines) aligns with the vanity: relocating plumbing adds cost and complexity.
Wall-mounted toilets work the same way, cantilevered off a steel carrier frame concealed in the wall. The carrier supports the toilet weight (up to 500 pounds) and houses the flush mechanism. The visual payoff is significant: more visible floor and easier cleaning. The tradeoff is cost (carriers and bowls run $400–$900 total) and installation complexity. This is a job for a plumber unless the wall framing is already open during a gut renovation.
Both wall-hung vanities and toilets require access to the carrier or mounting hardware for future repairs. Plan an access panel in an adjacent closet or hallway if possible.
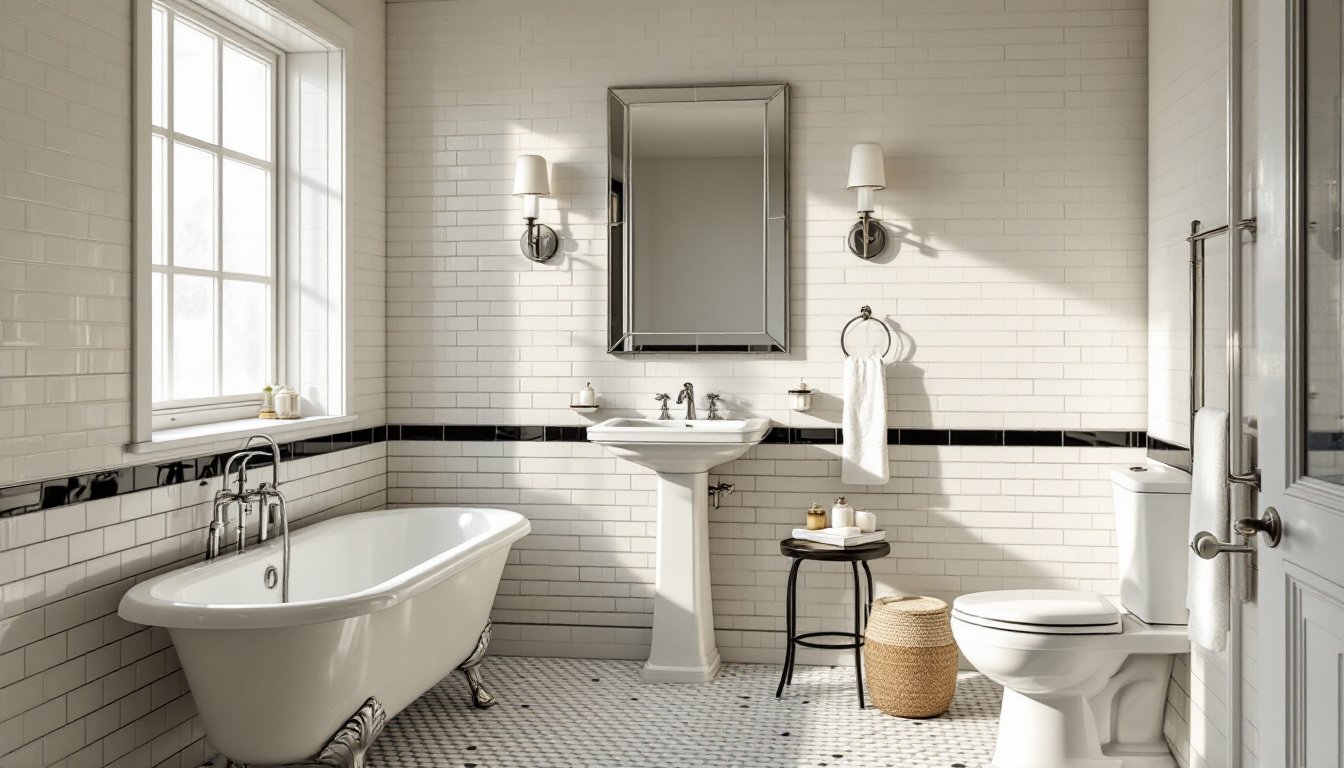
Shower vs. Tub: Making the Best Choice for Limited Space
In a bathroom under 50 square feet, the tub-or-shower decision often comes down to household needs and resale considerations.
A standard 60-inch alcove tub takes up roughly 15 square feet of floor space. A 36×36-inch corner shower uses about 9 square feet. That difference matters. If no one in the home takes baths, a tub is dead weight.
For families with young children or future resale concerns, keeping one tub in the home is smart, but it doesn’t have to be in the smallest bathroom. If the home has multiple bathrooms, dedicate the larger one to the tub and convert the small bath to a shower.
Curbless or low-threshold showers make the space feel more open and improve accessibility. They require careful floor sloping (¼ inch per foot toward the drain) and proper waterproofing, this is where a licensed plumber or tile installer is worth the cost. Many local codes require a linear drain for curbless designs to manage water flow effectively.
Corner showers with neo-angle doors (three panels in a diamond configuration) save space compared to rectangular units with pivot or sliding doors. They fit into tight corners and open outward without swinging into the toilet or vanity.
Glass enclosures, clear, not frosted, keep the room feeling open. Frameless or semi-frameless models look cleaner than heavy framed metal, though they cost more. When considering compact bathroom layouts, many homeowners explore ideas from design platforms focused on small spaces to see what works in real-world applications.
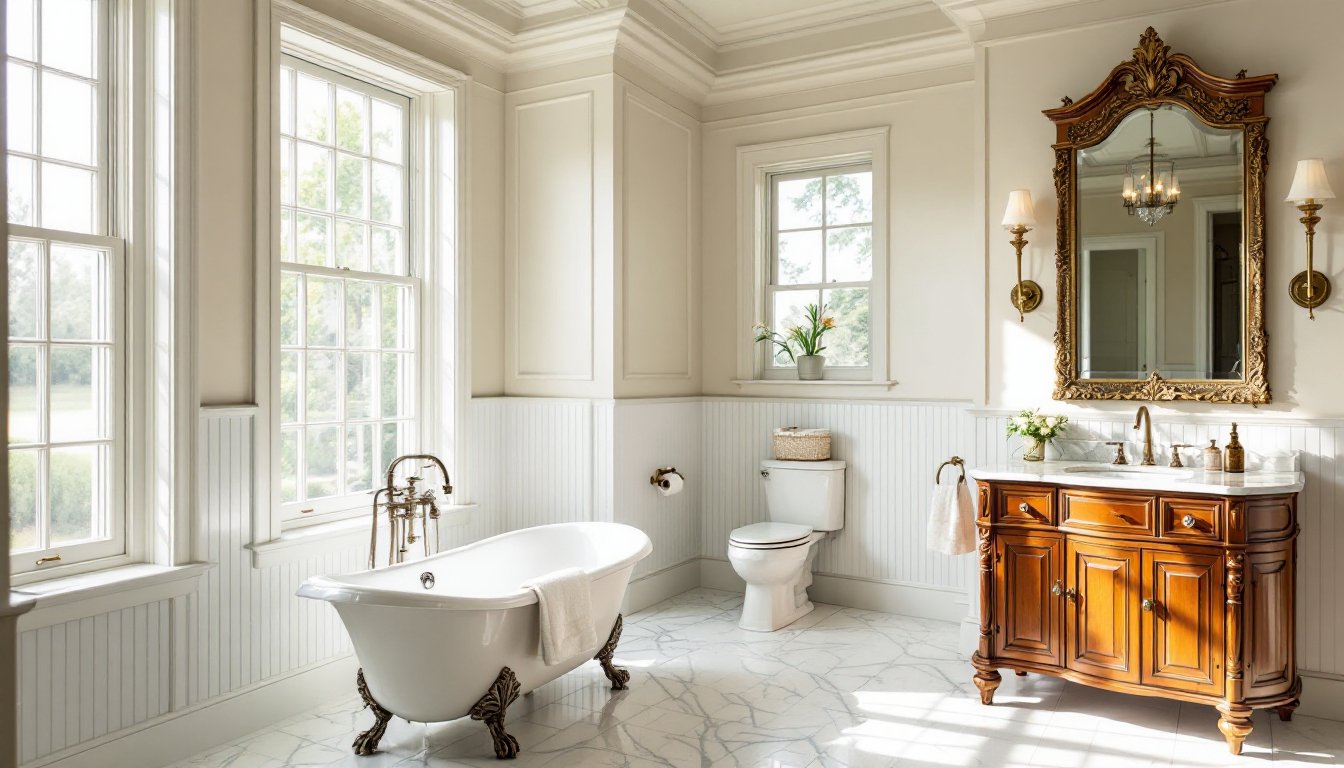
Mirrors and Reflective Surfaces to Create Depth
Mirrors double the perceived size of a small bathroom, but only if placed and sized correctly.
A large mirror above the vanity (ideally wall-to-wall or at least 70–80% of the vanity width) reflects more light and creates the illusion of a larger space. Avoid small, decorative mirrors in tight bathrooms, they fragment the wall and make the room feel smaller.
For maximum impact, extend the mirror from the countertop to within a few inches of the ceiling. A vertical mirror stretches the perceived height, especially helpful in bathrooms with standard 8-foot ceilings.
Mirrored medicine cabinets provide both function and reflection. Recessed models (mounted into the wall) save space compared to surface-mount versions that project 4–5 inches into the room.
Consider placing a mirror on an unexpected surface, opposite the entry door, for instance, to create a surprising sight line. Just avoid placing mirrors where they reflect the toilet directly: it’s functional, but visually awkward.
Reflective tile and high-gloss finishes amplify light. Glass subway tile, polished marble, or glazed porcelain in light tones reflect more than matte finishes. Use them as a backsplash, shower surround, or accent strip.
Metal finishes, chrome, brushed nickel, polished brass, add small moments of reflection. Faucets, towel bars, light fixtures, and cabinet hardware all contribute. Matte black is trendy but absorbs light: in a small, dark bathroom, stick with reflective metals.
If the room lacks natural light, consider a backlit mirror or LED mirror with integrated lighting. These are common in modern vanities and eliminate the need for separate sconces, streamlining the wall visually. Many homeowners reference design galleries showcasing mirror placements to visualize how reflective surfaces alter spatial perception before committing to installation.